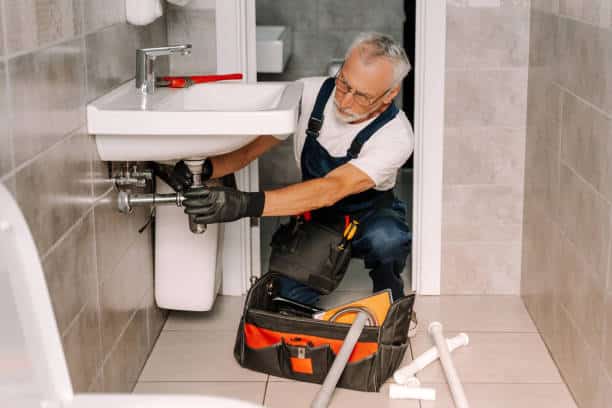
Your bathroom is more than just a functional space—it’s where your day begins and ends. Something as simple as a leaky or outdated faucet can disrupt the flow of your routine and affect the overall look of the room. Learning how to change a bathroom faucet is not only a practical skill but also a way to give your space a quick facelift without spending a fortune.
With the right guidance, tools, and patience, anyone can tackle this home project. And if at any point the task feels overwhelming, Drain Pro Plumbing & Septic is always here to provide expert assistance with bathroom plumbing and faucet replacement.
Why Learning How to Change a Bathroom Faucet Matters
A bathroom faucet may look small, but it plays a huge role in daily comfort and water efficiency. From washing hands to brushing teeth, the faucet is used multiple times a day. Over time, wear and tear can cause leaks around the faucet valve, corrosion near the sink drain, or weak water flow from aging supply lines. By learning how to change a bathroom faucet, you not only avoid costly water damage but also reduce utility bills and enhance your bathroom’s style.
At Drain Pro Plumbing & Septic, we often see homeowners surprised by how much of a difference a new bathroom faucet can make.
Preparing Your Bathroom Sink for Faucet Replacement
Before you begin, preparation is key. Start by clearing out items from under the bathroom sink so you have room to work. Lay down a towel or small bucket under the drain area to catch any dripping water lines.
Make sure you have the right tools ready: an adjustable wrench, plumber’s tape, and a new faucet that matches your existing sink faucets—whether single-handle or dual-handle. If this step feels confusing, Drain Pro Plumbing & Septic can help you select the right faucet replacement for your bathroom style and plumbing setup.
Shutting Off the Water Supply and Valves
Every bathroom faucet project starts with turning off the water supply. Look beneath the sink for the shutoff valve connected to the supply lines. Turn these valves clockwise until they’re fully closed. Afterward, open the faucet handle to release any remaining water in the lines.
At Drain Pro Plumbing & Septic, we always remind homeowners to double-check this step before loosening any nut or disconnecting lines. Forgetting could leave you with a soaked bathroom floor!
Disconnecting the Sink Drain and Water Lines
Next, focus on removing the old parts. Use your wrench to disconnect the water lines attached to the faucet. Then, unscrew the mounting nut that holds the faucet in place. Carefully detach the tailpiece and any connections linked to the sink drain.
If corrosion or rust makes removal tricky, don’t force it. That’s where a professional like Drain Pro Plumbing & Septic can step in to avoid damaging your sink or plumbing.
Removing the Old Bathroom Faucet
Now it’s time to take out the old faucet. Lift it straight out of the sink once the mounting nut and supply connections are detached. Clean around the faucet area to remove old plumber’s putty, dirt, or mineral buildup.
This step ensures your new bathroom faucet sits neatly against the surface, preventing leaks at the drain or countertop. If you need advice, the experts at Drain Pro Plumbing & Septic are only a call away.
Installing the New Faucet and Connecting Supply Lines
Place your new faucet into the mounting holes of the bathroom sink. Secure it by tightening the mounting nut with your adjustable wrench. Next, reconnect the supply lines, making sure each nut is firmly tightened but not overtightened.
Apply plumber’s tape around threaded areas of the valves to ensure a leak-free connection. Proper install techniques here are crucial. That’s why many homeowners trust Drain Pro Plumbing & Septic for professional faucet installations, ensuring long-term reliability.
Reconnecting the Sink Drain and Tailpiece
Your next focus is the sink drain assembly. Reattach the tailpiece and tighten the connection at the drain to ensure smooth water flow. Proper alignment is critical here, as even a slightly loose nut can lead to dripping or slow leaks.
When working with bathroom faucets, homeowners sometimes overlook this detail. That’s why Drain Pro Plumbing & Septic provides thorough checks during every faucet replacement project.
Testing the Faucet and Checking for Leaks
With everything reconnected, slowly turn on the supply valves and let the water run. Inspect the lines, nuts, and drain for any signs of leaks. Run both hot and cold faucets to ensure the faucet valve functions properly.
If you notice a drip, gently tighten the connections with your wrench. If the issue continues, calling Drain Pro Plumbing & Septic ensures the problem is resolved quickly and effectively.
When to Call Drain Pro Plumbing & Septic for Help
While learning how to change a bathroom faucet is doable, not every situation is straightforward. Stubborn mounting nuts, corroded valves, or mismatched supply lines can turn a simple task into a frustrating one.
That’s when having experts like Drain Pro Plumbing & Septic makes all the difference. With years of experience handling sink faucets, drains, and water lines, our team ensures a flawless install every time.
Enjoying Your Fresh Bathroom Upgrade
Completing a faucet replacement not only refreshes your bathroom sink but also boosts efficiency and comfort. A properly installed faucet saves water, prevents leaks, and enhances your bathroom’s overall design.
Whether you’re updating for style, functionality, or necessity, Drain Pro Plumbing & Septic is here to guide you every step of the way.
From DIY to Pro Help, We’ve Got You Covered
Changing a bathroom faucet may sound intimidating at first, but with the right tools, steps, and patience, it’s an achievable DIY project. Remember to take it slow, double-check connections, and always test for leaks. If the process feels overwhelming or if you run into tricky plumbing issues, trust Drain Pro Plumbing & Septic to deliver fast, reliable, and professional service.

